Diagnosing LCD Problems
If you are experiencing problems with the LCD display, there are a few checks you can make to diagnose the problem. For example, it can be useful to determine whether the problem is the LCD panel or the backlight.
Known Problems
Backlight Remains Off
If the backlight remains off after booting, this can mean that either the board is running an old kernel, using the wrong device tree binary (dtb), or that the backlight itself is not connected. Follow the procedure below to diagnose which of these possible causes is the problem.
Stripes Along the Display Length
If the backlight is on and the display shows stripes parallel to the longest edge of the screen, the fault is probably due to an old kernel and display driver. Follow the procedure below, paying special attention to the first step.
Procedure
As a general guide, the following steps can be diagnose and cure the problem:
Check that you are running an up-to-date kernel.
Log in to the development board and type the following at the command line:
uname -v
You should see output like the following:
#1 SMP PREEMPT Wed Feb 20 14:38:03 PST 2019
Generally, kernels with a date later than this should have a working driver for the display panel.
The simplest solution is to reflash the software on the board – see Flashing the System Image for instructions.
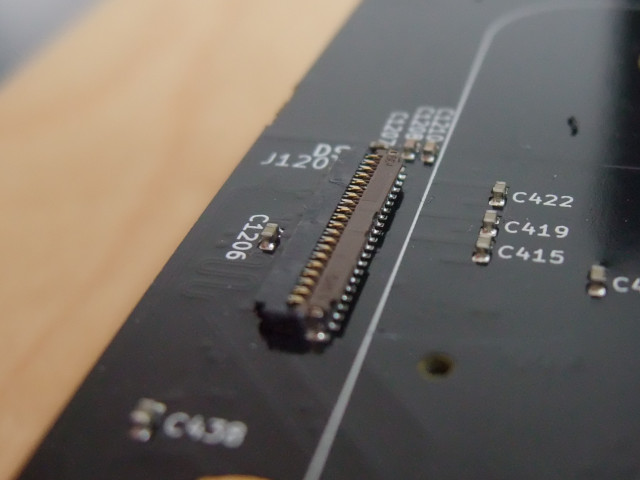
Check the ribbon cable.
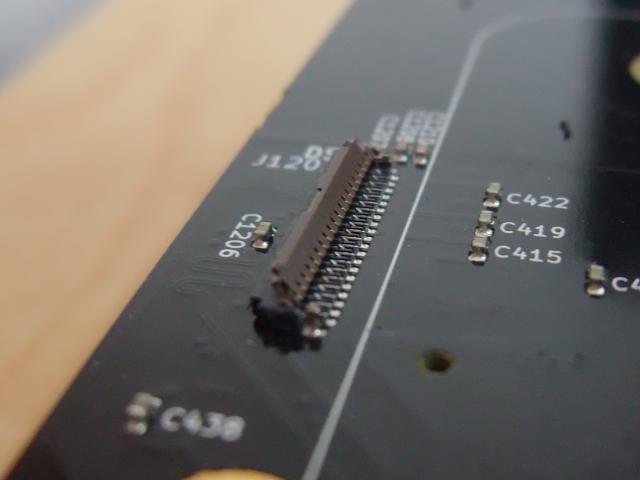
The ribbon cable should be inserted squarely into the J1202 connector on the board. If it is inserted at an angle, perhaps due to movement of the panel, then it needs to be reinserted properly. Power down the development board before attempting to reinsert the cable.

The location of the LCD ribbon cable connector
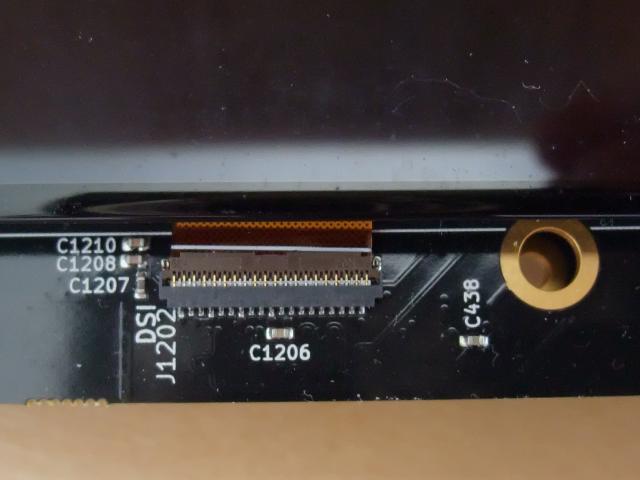
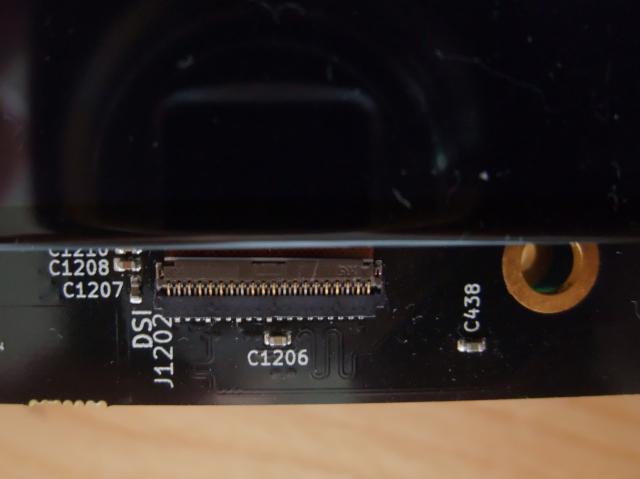
The socket holding the ribbon cable can be opened by carefully inserting a tool with a thin, flat surface into the socket between the cable and the lid of the socket. The socket’s lid can then be flipped open, as shown in the following images. You should not need to remove the screen to open the socket – the screen was removed to illustrate the socket more clearly.
With the socket open, position the end of the cable on top of the pins underneath, so that the cable covers them, ensuring that the end of the cable is parallel with the long edge of the socket.

Cable not placed, cable placed, socket lid closed
The white line on the cable should be covered, at least partially, by the lid of the socket. It should run parallel to the socket’s edge.
The ribbon cable may not need to be perfectly aligned with the socket – some slight misalignment should not cause problems as long as a good connection is made. If your cable looks like the one in the left picture, but your display is functioning, there is no need to reinsert the cable. However, you should be aware that the cable may need reinserting if you encounter display problems.
Use a spotlight to check the LCD display.
If the backlight is off, it can be difficult to check that the LCD display itself is working. However, if you shine a spotlight onto the center of the panel, you may be able to see a faint image of a digital clock:
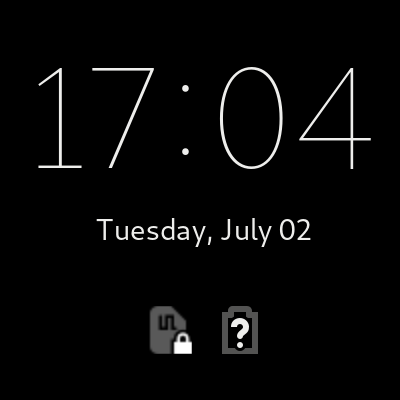
Swiping the screen should cause the text to move and/or disappear.
If none of these checks result in an obvious cause, please get in touch.