Part 1: Using a Title Bar
Overview
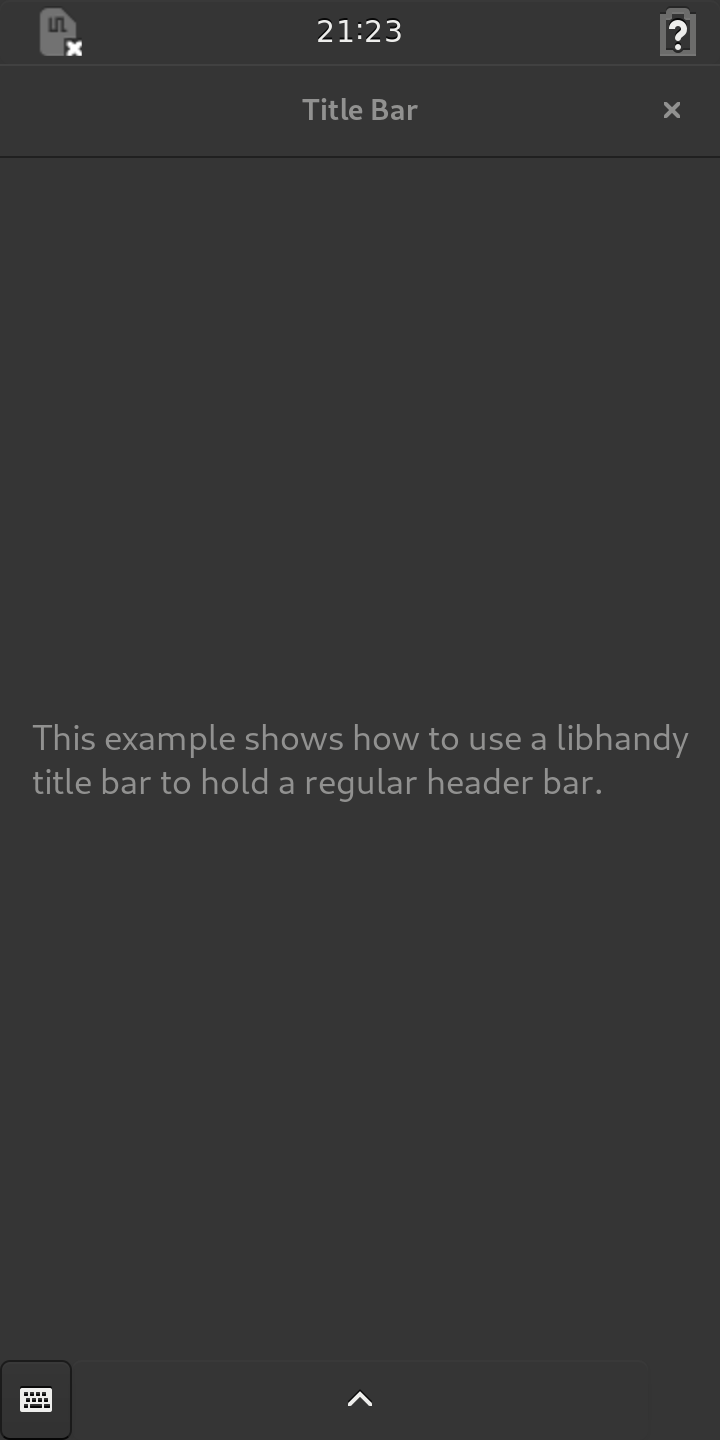
When run, the application described in this part of the tutorial simply shows a window with a title bar containing some text.
The main source code for the application can be found in the main.py file
within the src directory. The purpose of the other files is explained in
other tutorials, such as the Your First Application tutorial.
The Program
Because the application is very simple, we show the whole main program here to provide an overview before looking at the details:
# -*- coding: utf-8 -*-

# Copyright (C) 2019 Purism SPC
# SPDX-License-Identifier: GPL-3.0+
# Author: David Boddie <david.boddie@puri.sm>

import sys
import gi
gi.require_version('Gtk', '3.0')
from gi.repository import GLib, Gtk

gi.require_version('Handy', '0.0')
from gi.repository import Handy
Handy.init()


class Application(Gtk.Application):

    def __init__(self):
        super().__init__(application_id='com.example.title_bar')
        GLib.set_application_name('Title Bar')
        GLib.set_prgname('com.example.title_bar')

    def do_activate(self):
        window = Gtk.ApplicationWindow(application=self)
        window.set_icon_name('com.example.title_bar')

        title_bar = Handy.TitleBar()
        header = Gtk.HeaderBar(title='Title Bar', show_close_button=True)

        title_bar.add(header)
        window.set_titlebar(title_bar)

        label = Gtk.Label(wrap=True)
        label.set_markup('<big>This example shows how to use a libhandy '
                         'title bar to hold a regular header bar.</big>')

        window.add(label)
        window.show_all()


def main(version):

    app = Application()
    return app.run(sys.argv)
Much of the is very similar to other examples and tutorials. We will focus on the parts that are specific to this example.
Relevant Modules
The program begins by importing the modules it needs to create a user
interface. In addition to the standard Gtk module we use the Handy
module in order to access the widgets of the libhandy library:
gi.require_version('Handy', '0.0')
from gi.repository import Handy
Handy.init()
When importing the Handy module, it is important to specify the version of
the API that will be used.
Creating the User Interface
The Application class provides the usual methods to set up the application
and perform tasks when it is run. In the do_activate method we set up the
user interface:
    def do_activate(self):
        window = Gtk.ApplicationWindow(application=self)
        window.set_icon_name('com.example.title_bar')

        title_bar = Handy.TitleBar()
        header = Gtk.HeaderBar(title='Title Bar', show_close_button=True)

        title_bar.add(header)
        window.set_titlebar(title_bar)
We use a Handy.TitleBar as the title bar instead of directly using a
Gtk.HeaderBar widget. Handy.TitleBar makes it possible to use animations
between headers in the title bar, although in this case we only use a single
Gtk.HeaderBar widget.
We also create a label to make the window more interesting, and we add it to the window itself:
        label = Gtk.Label(wrap=True)
        label.set_markup('<big>This example shows how to use a libhandy '
                         'title bar to hold a regular header bar.</big>')

        window.add(label)
        window.show_all()
The window is shown using the show_all method so that both the window and
its contents are displayed.
Running the Application
See the Building the Applications and Packaging the Applications sections for information about building, packaging and running the application.
Summary
This part of the tutorial showed how a Handy.TitleBar widget to hold a
standard Gtk.HeaderBar. The Handy.TitleBar is set as the title bar
instead of setting the Gtk.HeaderBar directly.
It is not necessary to use a Handy.TitleBar to hold a single widget.
However, by using one, we lay the foundations for later parts of the tutorial.